
Best Snowball Cookies Recipe
ADVERTISEMENT
ADVERTISEMENT
Best Snowball Cookies Recipe
Part I: The Philosophy & The Foundation – Understanding the Elements
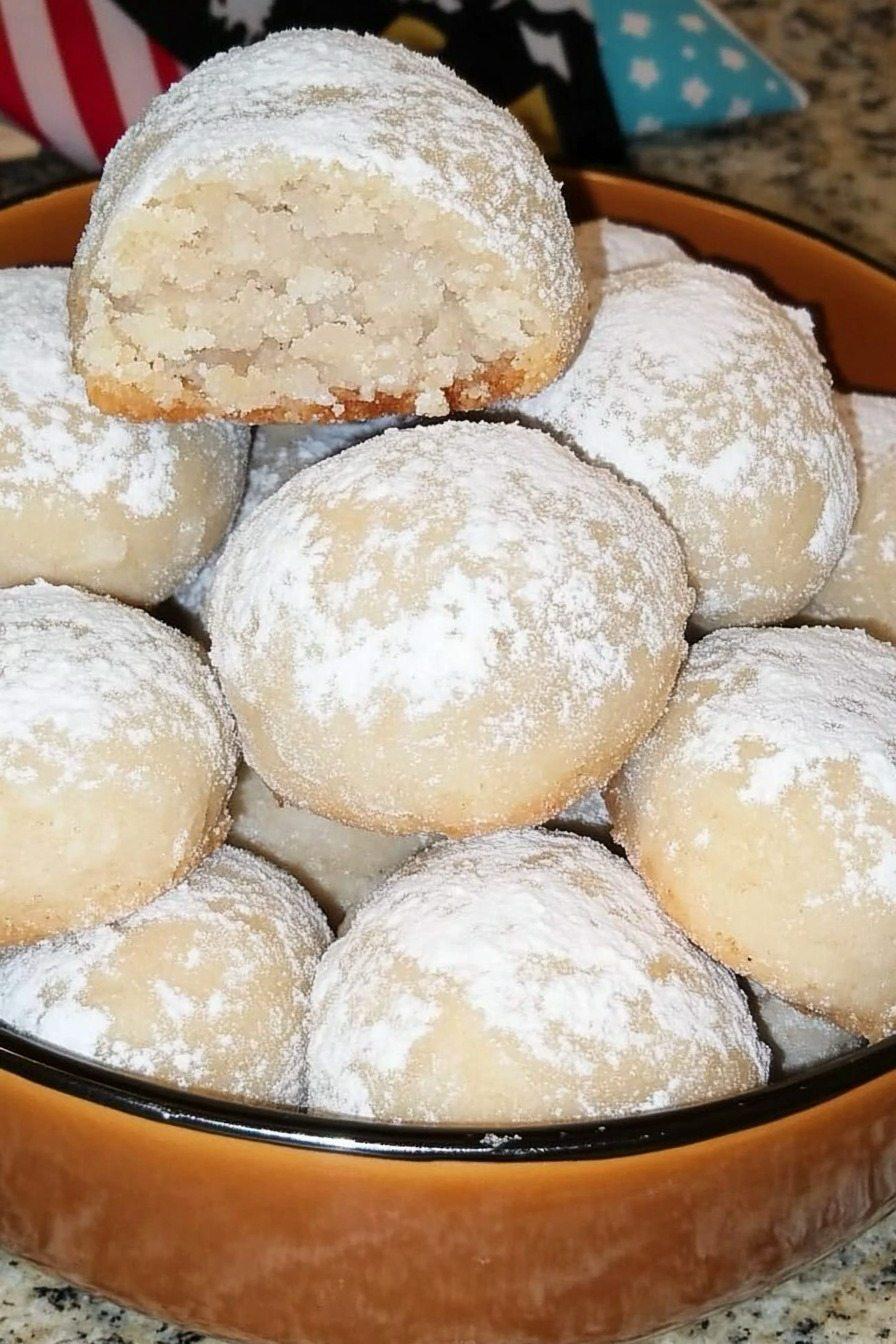
A perfect Snowball Cookie is a textural paradox: it should be sturdy enough to hold its spherical shape, yet disintegrate into a buttery, nut-flecked crumble upon the slightest pressure of the tongue. This magic is not an accident; it is engineered through fat, protein, and heat.
Ingredient Intelligence: The Role of Each Player
Unsalted Butter, at room temperature (1 cup / 2 sticks): The undisputed star and structural architect. Butter is not merely a flavor carrier here; it is the primary source of fat that creates the cookie’s signature “short” or tender crumb. When creamed with sugar, it traps tiny air bubbles that expand in the oven, providing lift. As the cookie bakes, the water in butter steams, further contributing to a delicate structure. Using unsalted butter is non-negotiable—it grants you complete control over the seasoning. “Room temperature” is critical: it should be pliable but cool, about 65-68°F, leaving a slight indentation when pressed. Too cold, and it won’t cream properly; too warm, and it will create a greasy, flat cookie.
Powdered Sugar (Confectioners’ Sugar): This ingredient performs two distinct, vital roles.
In the Dough (½ cup): Powdered sugar contains about 3% cornstarch, which acts as a tenderizing agent, inhibiting gluten formation. Its super-fine texture dissolves instantly into the butter, creating a smooth, cohesive base without the graininess or excessive aeration that granulated sugar would provide. This results in the coveted fine, sandy crumb.
For the Coating (1 cup, reserved): This is the cookie’s iconic “snow.” The double-coating process—first while warm to create a slightly melted, tacky layer, and again once cool for a thick, pristine finish—is what gives the cookie its name and its delightful first impression.
Pecans (1 ½ cups, finely chopped): The soulful counterpoint. Pecans provide essential flavor depth, a subtle toastiness, and crucial textural contrast. Their natural oils enrich the dough, while their fine particles interrupt the structure, ensuring tenderness. Toasting is the transformative step. Toasting at 350°F for 7-9 minutes until fragrant unlocks their volatile oils, intensifying their flavor exponentially and providing a nuttiness that permeates every bite. They must be cooled completely before chopping to prevent steaming and gumminess in the dough.
All-Purpose Flour (2 ¼ cups): The gentle framework. It provides just enough protein (gluten) to give the dough shape without developing toughness. For the most tender cookie, spoon the flour lightly into your measuring cup and level it off—never pack it. This prevents over-measuring, which is the most common cause of dry, crumbly cookies.
Pure Vanilla Extract (2 teaspoons): The aromatic enhancer. Its warm, floral notes round out the butter and nut flavors, adding a layer of comforting complexity that elevates the cookie from simple to sublime. Always use pure extract for the best flavor.
Salt (½ teaspoon): The secret conductor. Salt is not there to make the cookies taste salty; it is a flavor amplifier. It sharpens the sweetness, brightens the nuttiness, and balances the richness of the butter, ensuring the cookie never cloys.
Instructions:
Part II: The Master Method – A Step-by-Step Symphony of Technique
Success lies in a sequence of carefully controlled actions. Read through completely before beginning.
Phase 1: The Mise en Place & Prep (20 minutes)
Preparation is 80% of the battle for a consistent, stress-free bake.
Toast & Process the Pecans: Spread raw pecan halves on a baking sheet. Toast in a preheating 350°F oven for 7-9 minutes, watching closely to avoid burning. Cool completely on the sheet. Using a chef’s knife or food processor, chop until they resemble fine gravel—some tiny pieces and some slightly larger for texture. Do not grind into a paste.
Prepare Baking Sheets: Line two heavy-gauge, light-colored baking sheets with parchment paper. Dark sheets can over-brown the bottoms.
Measure Everything: Have all ingredients measured and at their proper temperatures. Separate your powdered sugar: ½ cup for the dough, and 1 cup sifted into a wide, shallow bowl for coating.
Bring Butter to Perfect Temperature: If needed, cube cold butter and let it sit at room temperature for 45-60 minutes.
Phase 2: The Creaming & Mixing – Building the Structure (10 minutes)
This stage is about incorporating air and creating an emulsion.
Preheat Oven: To 350°F (175°C). A perfectly preheated oven is essential for even baking.
Cream Butter & Sugar: In the bowl of a stand mixer fitted with the paddle attachment (or using a hand mixer), combine the room-temperature butter and ½ cup of powdered sugar. Beat on medium-low speed for 1 minute to combine, then increase to medium-high speed and beat for a full 2-3 minutes. The mixture should become very pale, almost white, and noticeably fluffy. This step incorporates air and ensures the sugar is fully dissolved.
Incorporate Dry Ingredients: With the mixer on low speed, add the vanilla extract. Then, add the flour and salt all at once. Mix on low just until the flour is partially incorporated, about 15 seconds. Add the cooled, chopped pecans. Continue mixing on low until the dough comes together in large clumps and no dry flour remains, about 30 more seconds. Do not overmix. The dough will be soft and slightly crumbly but should hold together when pressed.
Phase 3: The Forming – Precision for Perfection (15 minutes)
Portion the Dough: Using a #60 (1-tablespoon) cookie scoop or a measuring tablespoon, portion the dough. Roll each portion firmly between your palms into a smooth, compact ball. This pressure is important—it eliminates air pockets and ensures a uniformly round, crack-free cookie. Place balls 1.5 inches apart on prepared sheets. They will spread only slightly.
Phase 4: The Baking – A Study in Gentle Heat (10-12 minutes)
Bake in Batches: Place one sheet on the center rack of the oven. Bake for 8-12 minutes. The cookies are done when the bottoms are lightly golden and the tops are set and pale, with perhaps the faintest hint of color at the edges. They will still feel soft if touched. The key is to remove them before they brown on top. Overbaking is the enemy of tenderness.
The Critical Cool: Remove the sheet from the oven and let the cookies rest on the hot pan for exactly 5 minutes. This allows them to set enough to be handled without collapsing, but remain warm enough for the first sugar coating to adhere properly.
Phase 5: The Double Coating – The Signature Finish (10 minutes)
First Sugar Coat: One by one, gently roll each warm cookie in the bowl of reserved powdered sugar. Use a fork to gently lift and turn them, ensuring an even, generous coat. The warmth will cause the sugar to slightly “melt” into the surface, creating a perfect adhesive base. Place the sugared cookies on a wire rack.
Final Set & Second Coat: Allow the cookies to cool completely on the rack, about 30 minutes. The sugar coating will have dried and sunk in slightly. Now, roll each cookie in the powdered sugar a second time. This final coat creates the iconic, thick, snowy appearance and an extra burst of sweet flavor with each bite.
Part III: The Artisan’s Variations & Flavor Explorations
Once the classic is mastered, the canvas awaits your creativity.
Citrus-Kissed Snowballs: Add the finely grated zest of one orange or two lemons to the butter during creaming. The bright acidity cuts beautifully through the richness.
Spiced Winter Snowballs: Whisk 1 teaspoon of ground cinnamon, ¼ teaspoon of ground nutmeg, and a pinch of ground cloves into the flour mixture. A drizzle of spiced icing is divine.
Chocolate-Dipped Snowballs: After the final sugar coat, dip half of each cooled cookie into melted dark chocolate. Let set on parchment for a decadent twist.
Nut Variations: Substitute pecans with an equal amount of toasted, skinned hazelnuts, walnuts, or macadamia nuts. For a nut-free version, use an equal amount of toasted, cooled rolled oats processed into a coarse meal.
Brown Butter Snowballs: Gently brown the butter until nutty and golden, then cool until solid but still pliable. Use in place of regular butter for an incredibly deep, caramelized flavor profile.
Part IV: The Sage’s Troubleshooting Guide
Cookie is too hard/crumbly: Over-measuring of flour is the most likely culprit. Ensure you are spooning and leveling. Alternatively, the dough was overmixed after adding flour, developing too much gluten.
Cookie spreads too much/flattens: Butter was too warm when creamed, or the oven temperature is inaccurate. Check with an oven thermometer. Ensure you are using a full-fat butter, not a spread.
Cookie is bland: Undersalting or using un-toasted nuts. Salt is crucial, and toasting nuts is non-optional for flavor.
Powdered sugar coating melts in/becomes sticky: The cookies were too hot when first coated, or humidity is high. Ensure the 5-minute rest. For humid climates, the second coat can be applied just before serving.
Bottom of cookie burns: Using a dark-colored baking sheet (which absorbs more heat) or placing the sheet on a lower oven rack. Always use parchment and light-colored pans.
Conclusion: The Timeless Gift of a Perfect Bite
The Snowball Cookie is an edible heirloom, a recipe passed down through generations not for its complexity, but for its pure, comforting essence. To make them is to engage in a quiet, mindful ritual—the rhythmic creaming, the meditative rolling of balls, the gentle shower of snowy sugar. The result is a gift, both to yourself and to others: a delicate, buttery morsel that offers a moment of sweet, meltaway peace. It is proof that true indulgence often resides in the simplest of things, executed with care and understanding. So, preheat your oven, toast those pecans, and prepare to create not just cookies, but little spheres of edible joy.
ADVERTISEMENT


ADVERTISEMENT
Comment