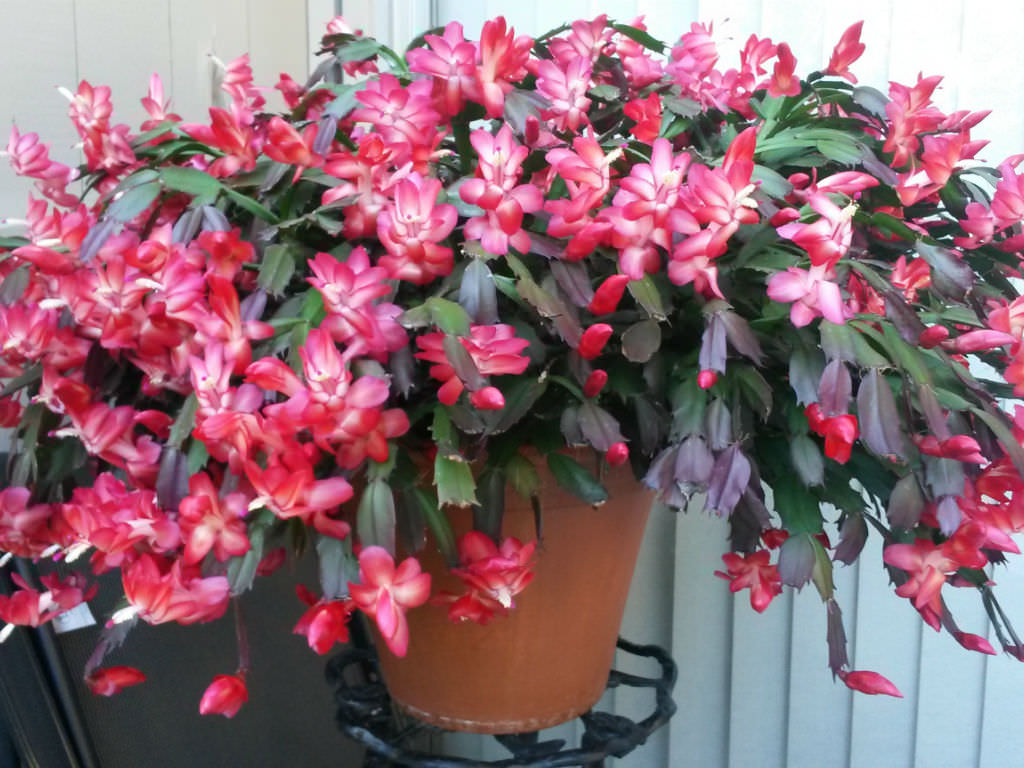
10 Tips for Getting Your Christmas Cactus to Bloom for the Holidays

My Christmas cactus has a sense of humor – a twisted one.
Last year, it finally covered itself in buds right around Valentine’s Day.
The year before? Nothing.
Just green segments gathering dust on the windowsill while everyone else’s plants put on their holiday show.
What am I doing wrong?
Turns out, plenty.
These plants aren’t the foolproof bloomers everyone claims they are – at least not without some specific conditions.
I’ve killed blooms with kindness, moved plants at exactly the wrong moment, and learned the hard way that “easy care” doesn’t mean “blooms on command.”
So I tested what actually works, talked to someone who knows their stuff, and figured out where I’d been going wrong.
Some of these tips surprised me, and that closet trick everyone swears by? Not quite what you think.
Tip 1: Darkness is Your Secret Weapon (But Not How You Think)
You’ve probably heard you need to stick your Christmas cactus in a dark closet for weeks. Not really.
What these plants actually need is consistent darkness at night, 12 to 14 hours of uninterrupted darkness, to be exact.
That means no streetlights streaming through windows, no bathroom light left on, no quick midnight phone checks near the plant.
I tested this by covering mine with a cardboard box each evening starting in early October. Six weeks later? Buds appeared like clockwork.
The trick isn’t total darkness – it’s consistent darkness during nighttime hours, which signals the plant that winter is coming and it’s time to bloom.
Tip 2: Cool Things Down (Yes, Really)
Here’s what clicked for me: Christmas cacti bloom in response to cool fall temperatures, not just short days.
They need nighttime temps between 50-55°F for about a month to set buds.
My breakthrough came when I moved mine to an unheated guest room in October. Within weeks, I had buds forming.
If you don’t have a cool room, try a enclosed porch, garage with a window, or even near (not on) a drafty window.
Just avoid anywhere that dips below 45°F – that’s too much of a good thing.
Tip 3: Stop Overwatering (Even If You Think You’re Not)
I killed my first Christmas cactus with kindness-specifically, too much water.
These are cacti, after all. During the fall bloom-prep period, they need even less water than usual. If the soil feels damp, don’t water. Period.
Signs you’re overdoing it: mushy stems, yellowing segments, or that slightly funky smell when you stick your finger in the soil. I water mine every 10-14 days in
October and November, letting the top inch get completely dry between drinks. That mild stress actually encourages blooming.
Tip 4: The Fertilizer Question Everyone Gets Wrong
Here’s the myth: Feed your Christmas cactus right up until it blooms to maximize flowers. Wrong.
Stop fertilizing in September, at least six weeks before you want blooms. Why?
The plant needs to shift from growth mode to reproduction mode, and excess nitrogen keeps it focused on making leaves instead of buds.
I use a balanced liquid fertilizer (like 10-10-10) monthly from spring through August, then nothing until after it finishes blooming.
That fertilizer break was my game-changer.
Tip 5: Location, Location, Location
Don’t put your Christmas cactus near heating vents, in a dark corner, or in that sunny south window.
I moved mine four times the first year! From the kitchen windowsill (too warm) to the dining room (too dark) to the living room bookshelf (finally, just right).
The sweet spot? Bright, indirect light in a cooler room. East or north-facing windows work beautifully.
If your plant’s segments look thin and the color seems pale, it’s not getting enough light. Reddish edges? Too much sun.
Tip 6: Don’t Touch It (Seriously, Stop Fussing)
Once buds form, leave your plant alone. I learned this after rotating mine “just to even out the growth” and watching every single bud drop within three days. Heartbreaking.
Christmas cacti are dramatic about changes once they’ve committed to blooming. Moving them, even turning the pot, can trigger bud drop.
The science: They’ve oriented themselves to their light source, and shifting that relationship stresses them out.
My strategy now? Pick the spot in October and pretend the plant is glued there until December.
Tip 7: Start Your Prep in October (Mark Your Calendar)
Early October: Move it to a cool location, start the darkness routine.
Mid-October: Cut back watering.
Early November: Watch for tiny buds at leaf tips.
Mid-November: Buds should be visible.
December: Blooms!
The timing matters because it takes 6-8 weeks of cool temps and long nights to trigger bud formation.
Note to self: I used to start this in November and wonder why I got February flowers instead of Christmas ones. Those six weeks aren’t negotiable-the plant needs time to shift gears.
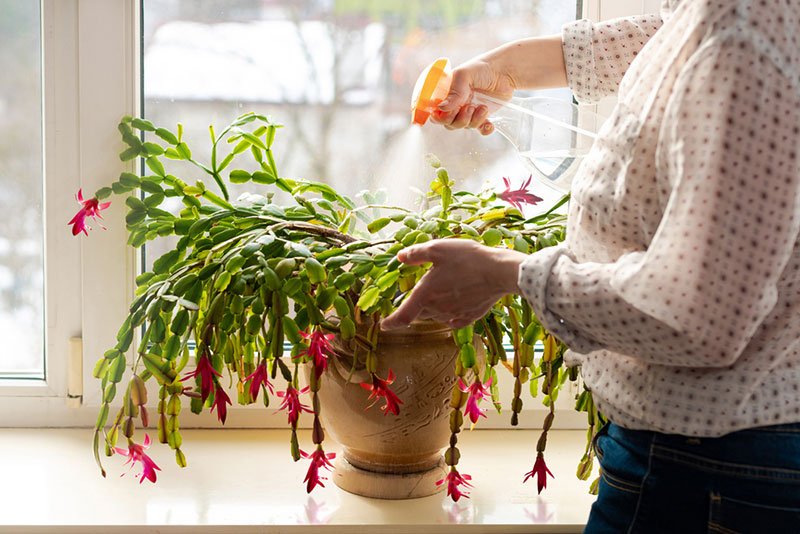
Tip 8: Humidity Helps, But Don’t Go Crazy
Christmas cacti are tropical plants that appreciate humidity, but they’re not orchids. Dry air won’t kill them – it just makes blooms less likely.
I tried a pebble tray (meh, barely noticed a difference) and misting (too much work).
What actually worked? Grouping my Christmas cactus with other plants and keeping it away from forced-air heat. That’s it.
If your home’s humidity is above 40%, you’re fine. Below that? A simple pebble tray with water under the pot may help. Good enough beats perfect.
Tip 9: Check Your Variety (Plot Twist!)
Here’s my embarrassing confession: I spent two years trying to get my “Christmas” cactus to bloom in December. It always bloomed in November.
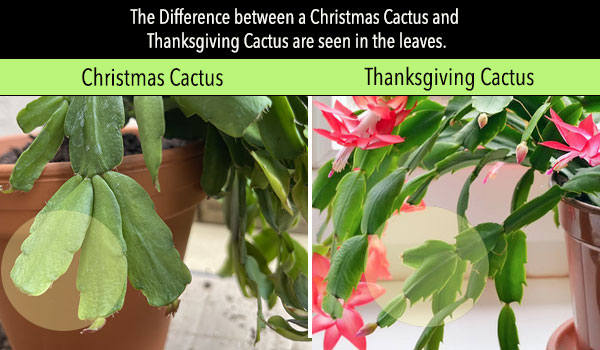
Or was it… a Thanksgiving cactus all along?
Check the leaf edges. Pointed, claw-like projections? Thanksgiving cactus. Rounded, scalloped edges? Christmas cactus. Flat with minimal curves? Easter cactus (blooms in spring).
They need the same care, just different timing. Once I accepted mine was a November bloomer, life got much easier. Know what you’re actually growing.
Tip 10: Accept That Sometimes They’re Just Stubborn
Let’s be honest: Some Christmas cacti march to their own drummer. I’ve done everything right and still had plants bloom in January.
If yours misses the holiday window, don’t toss it. Those late blooms are still gorgeous-and winter could use more flowers anyway.
Keep up the care, enjoy whenever it decides to perform, and maybe try again next fall with adjusted timing.
If your neighbor’s cactus blooms like clockwork every December? More power to them. Yours will bloom when it’s good and ready.