dimanche 21 décembre 2025

Raspberry Pretzel Salad

by


I grew up with this bright, crunchy, and creamy Raspberry Pretzel Salad on holiday dessert tables — a sweet-tart layer cake in salad clothing. It’s a no-fuss, make-ahead dessert with a salty pretzel crust, a fluffy cream-cheese middle, and a glossy raspberry Jell-O top studded with fresh berries. If you like contrasts (sweet and salty, crunchy and silky), this is the kind of dessert that disappears fast. For a summer potluck twist, compare this to a similar fruit-and-cracker bar like  to see how fruit changes the profile.


Why you’ll love this dish

Raspberry Pretzel Salad is the sort of recipe that hits a lot of sweet spots: it’s inexpensive, quick to assemble, kid- and crowd-approved, and it travels well for picnics or potlucks. The salty pretzel base keeps the cream cheese layer from feeling too heavy, and the raspberry gelatin adds a glossy, jewel-like finish that looks impressive with very little effort.


"This is the dessert everyone asks about — it’s like a cheesecake that behaves at a picnic." — happy potluck reviewer


If you want something reliably popular at gatherings (and a good companion to lighter mains), this fits perfectly. For another make-ahead salad with that same family-friendly vibe, check out this retro-style .


How this recipe comes together

Overview: First you press and bake a salty-crumb crust so it sets and holds up to the creamy layer. Next, you whip a sweetened cream cheese filling with whipped topping for lightness and spread it over the cooled crust. Finally, you dissolve raspberry gelatin in boiling water, cool it slightly, fold in fresh raspberries, and pour it over the cream-cheese layer. The whole pan chills for a few hours until the gelatin sets. The process is straightforward and largely assembly — no special equipment needed.


What you’ll need

2 cups crushed pretzels (about 6–7 ounces whole pretzels, crushed)

3/4 cup melted butter

1/4 cup sugar (for crust)

1 cup granulated sugar (for filling)

1 (8 oz) package cream cheese, softened

1 (8 oz) container whipped topping (thawed)

1 (6 oz) package raspberry gelatin (Jell‑O)

2 cups boiling water

2 cups fresh raspberries

Notes and substitutions:


Crushed graham crackers or salty crushed crackers can replace pretzels if needed, though pretzels are traditional for the sweet-salty contrast.

Use full-fat cream cheese for best texture. Neufchâtel will work but may be slightly softer.

If fresh raspberries aren’t available, frozen (thawed and drained) can work — see Tips below.

Step-by-step instructions

Pin this recipe to make it later

Pin It!

Delicious Raspberry Pretzel Salad with creamy filling and crunchy pretzel crust

Preheat the oven to 350°F (175°C). Mix the crushed pretzels, melted butter, and 1/4 cup sugar in a bowl until evenly moistened. Press the mixture firmly into the bottom of a 9×13-inch pan. Bake 10 minutes. Remove and cool completely.

Beat the softened cream cheese with 1 cup sugar until smooth and creamy. Gently fold in the whipped topping until the mixture is uniform and airy. Spread this cream-cheese layer evenly over the cooled pretzel crust.

In a heatproof bowl, dissolve the raspberry gelatin in 2 cups boiling water, stirring until fully dissolved. Let the gelatin cool slightly but not set.

Stir the fresh raspberries into the slightly cooled gelatin, then pour the mixture carefully over the cream-cheese layer. Spread gently if necessary to cover the surface.

Refrigerate the pan for at least 4 hours, or until the gelatin is fully set. Cut into squares and serve chilled.

Tips in action: press the crust firmly so it holds together when you slice the salad; allow layers to cool so they don’t blend into one another.


Best ways to enjoy it

Serve chilled in neat squares. A dollop of extra whipped topping, a few whole raspberries, or a light dusting of crushed pretzels on top makes for attractive plating. This dessert pairs well with coffee, iced tea, or a sparkling white wine. For a picnic, keep the pan in a cooler and slice right before serving so the pretzel crust remains crisp. If you’re looking for more party-friendly salads with similar make-ahead convenience, take a look at this classic  for savory side inspiration.


Storage and reheating tips

Refrigeration: Store covered in the refrigerator for up to 3–4 days. The gelatin will hold, but the crust will slowly soften as it absorbs moisture from the filling.

Freezing: I don’t recommend freezing assembled pretzel salad; gelatin and whipped topping change texture when frozen and thawed. If you must freeze, freeze individual slices quickly wrapped in plastic and expect a softer texture after thawing.

Make-ahead: You can prepare the crust and cream-cheese layer a day ahead. Keep them chilled, then add the raspberry gelatin layer the day of serving so the top looks freshest.

Food safety: Keep the dessert chilled below 40°F (4°C). Discard if left out at room temperature for more than two hours, especially on hot days.

Helpful cooking tips

Don’t skip cooling the crust before spreading the cream-cheese layer — warm crust melts the filling and can make it weep.

Press the crust using the bottom of a measuring cup to get an even, compact layer.

Let the gelatin cool so it’s warm but not hot before you add the raspberries; very hot gelatin can break down delicate berries and make them mushy.

If using frozen raspberries, thaw and drain them well to avoid excess liquid that could thin the gelatin.

For a firmer set, chill the finished pan overnight. It’s easier to slice clean squares after a longer chill.

Creative twists

Berry swaps: Use strawberry or mixed-berry gelatin and matching fresh berries for a seasonal variation.

Citrus lift: Add a teaspoon of lemon zest to the cream-cheese layer to brighten the flavor.

Gluten-free: Replace pretzels with a certified gluten-free cracker or crushed gluten-free pretzels.

Mini versions: Make in individual parfait glasses or mini tart pans for single-serve presentation.

For a retro mashup, layer with other flavors like peach (similar to the ) to create a sampler tray.

Common questions

Q: How long does this take from start to finish?

A: Active hands-on time is about 25–35 minutes. Chill time is at least 4 hours, preferably overnight, so plan ahead.


Q: Can I use instant gelatin instead of powdered?

A: Use the flavored powdered gelatin packet as directed. Avoid substituting plain unflavored gelatin for the flavored packet unless you add sugar and flavor separately.


Q: Can I make this with frozen raspberries?

A: Yes — thaw and drain very well. Frozen berries release extra liquid, so drain thoroughly and pat dry to prevent the top layer from becoming watery.


Q: Is this dessert safe to leave out at a potluck?

A: Because it contains cream cheese and whipped topping, keep the dish chilled and don’t leave it out more than two hours at room temperature (one hour if above 90°F/32°C).


Q: Can I cut this into advance party slices and stack them?

A: It’s better to keep the dessert whole and slice just before serving; stacking slices can cause the crust to crumble and the gelatin to smear.

Italian Lemon Drop Cake

by


Italian Lemon Drop Cake is a delightful dessert that combines the bright and tangy flavor of lemon with a light and fluffy cake. Topped with a creamy lemon frosting and garnished with thinly sliced lemons, this cake is sure to impress.

Why Make This Recipe

If you’re a fan of lemon desserts, this Italian Lemon Drop Cake is a must-try. With its moist and tender crumb, zesty lemon flavor, and creamy lemon frosting, this cake is perfect for any special occasion or celebration.

How to Make Italian Lemon Drop Cake

Cake Ingredients:

  • 3 cups all-purpose flour
  • 2 tablespoons baking powder
  • 1 teaspoon kosher salt
  • 2 cups unsalted sweet cream butter, softened to room temperature
  • 1 3/4 cups sugar
  • 4 large eggs
  • 2 teaspoons pure vanilla extract
  • 1 cup buttermilk
  • 1 tablespoon lemon zest
  • 1/3 cup fresh lemon juice
  • 3 9-inch round cake pans

Frosting Ingredients:

  • 3 cups unsalted sweet cream butter, softened
  • 6 cups powdered sugar
  • 2 tablespoons lemon zest
  • 3 teaspoons fresh lemon juice
  • 3-6 tablespoons heavy whipping cream
  • Thinly sliced lemons for topping

Cake Directions:

  1. Preheat the oven to 350°F (175°C) and spray the cake pans with non-stick baking spray.
  2. In a large bowl, whisk together the flour, baking powder, and salt. Set aside.
  3. Using a stand mixer, beat the butter and sugar together until creamy.
  4. Beat in the eggs and vanilla extract until well combined.
  5. With the mixer on low speed, gradually add the dry ingredients just until combined.
  6. Still on low speed, add the buttermilk, lemon zest, and lemon juice. Mix just until combined.
  7. Pour the batter evenly into the prepared cake pans.
  8. Bake for approximately 21-26 minutes or until the cakes are baked through.

Frosting Directions:

  1. In a stand mixer, cream together all frosting ingredients until stiff and smooth peaks form.
  2. Using a cake slicer, slice a thin layer off the tops of the cakes to create a flat surface.
  3. Place one cake layer on your serving plate.
  4. Evenly cover the top with about 1 cup of frosting.
  5. Top with the second cake layer and evenly cover the top with about 1 cup of frosting.
  6. Repeat with the third cake layer.
  7. Spread the remaining frosting all over the top and sides of the cake.
  8. Scoop the remaining frosting into a piping bag fitted with a star tip and pipe dollops all over the cake.
  9. Pipe larger dollops of frosting onto the top of the cake.
  10. Place the thinly sliced lemons in between the larger dollops.
  11. Cut and enjoy your delicious lemon cake!

    Store any leftover cake covered in the refrigerator for up to 5 days. Make sure to cover it tightly to prevent it from drying out.

    Tips to Make Italian Lemon Drop Cake

    • Make sure all the cake ingredients are at room temperature before mixing to ensure a smooth and evenly baked cake.
    • If you don’t have buttermilk, you can make a substitute by adding 1 tablespoon of lemon juice or white vinegar to 1 cup of milk and letting it sit for 5 minutes.
    • For an extra lemony flavor, you can add more lemon zest and juice to the cake batter and frosting.

Peanut Butter Oatmeal Chocolate Chip Cookies

by


These Peanut Butter Oatmeal Chocolate Chip Cookies are the perfect combination of sweet and chewy, with a rich peanut butter flavor and plenty of chocolate chips. They’re easy to make and absolutely delicious!

Why Make This Recipe

These cookies are a delightful treat for any occasion. They combine the classic flavors of peanut butter and chocolate with the added texture of oats, making them both satisfying and indulgent.

Ingredients

  • ½ cup butter, softened
  • ½ cup peanut butter
  • ¾ cup brown sugar
  • ¼ cup white sugar
  • 1 large egg
  • 2 teaspoons vanilla extract
  • 1 cup all-purpose flour
  • ¾ cup old-fashioned oats
  • 1 teaspoon baking soda
  • ¼ teaspoon salt
  • ¾ cup mini chocolate chips
  • ½ cup regular chocolate chips

Instructions

⇆
  1. Preheat the Oven:
    • Preheat your oven to 350°F (175°C) and line a cookie sheet with parchment paper.
  2. Cream the Butter and Sugars:
    • In the bowl of a stand mixer, cream together the softened butter, peanut butter, brown sugar, and white sugar until light and fluffy.
    • Beat in the egg and vanilla extract until well combined.
  3. Combine Dry Ingredients:
    • In a medium bowl, combine the flour, oats, baking soda, and salt.
    • Gradually add the dry ingredients to the creamed mixture, beating until well combined.
  4. Add Chocolate Chips:
    • Stir in the mini and regular chocolate chips until evenly distributed throughout the dough.
  5. Scoop and Bake:
    • Use a medium cookie scoop to drop dough onto the prepared baking sheet, spacing them about 2 inches apart.
    • Bake for exactly 8 minutes. The cookies may look slightly underdone, but they will continue to set as they cool.
  6. Cool the Cookies:
    • Let the cookies cool on the baking sheet for 5 minutes to set up before transferring them to a wire cooling rack to cool completely.

How to Serve Peanut Butter Oatmeal Chocolate Chip Cookies

Serve these cookies with a glass of cold milk or a hot cup of coffee. They make a perfect snack, dessert, or treat for any time of the day.

How to Store and Reheat

  • Storing: Store the cookies in an airtight container at room temperature for up to 5 days.
  • Freezing: You can freeze the dough balls or baked cookies for up to 3 months. Thaw the dough balls and bake as directed, or thaw the baked cookies before enjoying.

Tips to Make Peanut Butter Oatmeal Chocolate Chip Cookies

  • Consistency: Make sure the butter is softened to achieve the best consistency for creaming with the sugars.
  • Mix-Ins: Feel free to add in your favorite mix-ins like nuts, raisins, or different types of chocolate chips.

Variations

  • Nut-Free: Use sunflower seed butter in place of peanut butter for a nut-free version.
  • Gluten-Free: Substitute with a gluten-free all-purpose flour blend and certified gluten-free oats.

Italian Cookies

by


I learned this Italian cookie recipe from a neighbor who baked them for every neighborhood gathering. They’re simple, buttery, and lightly almond-scented — a perfect little bite that disappears fast. These cookies are the kind you make for a bake sale, holiday platter, or an afternoon with coffee. They’re forgiving, quick to whip up, and endlessly customizable with different frostings or sprinkles.


For another soft Italian-style cookie with a tender crumb, try this ricotta version: .


Why you’ll love this dish

This recipe delivers classic, old-world flavors without fuss. You get a buttery cookie base brightened by vanilla and almond extracts, and a thin powdered-sugar glaze that keeps the texture light. It’s a smart pick when you need:


Fast baking for holiday trays or last-minute guests.

A kid-approved treat (they love frosting and sprinkles).

A budget-friendly cookie that uses pantry staples.

“Light, nostalgic, and perfect with an espresso — everyone asks for the recipe.” — a neighbor who can’t keep them on the platter


These cookies are also great for batch baking: they freeze well (unfrosted) and can be decorated later, which makes them ideal for party prep.


How this recipe comes together

This is a straightforward drop-cookie method. First you’ll mix the dry ingredients, then cream butter and sugar. Eggs and extracts join next, followed by the dry mix until just combined. You’ll drop tablespoon-sized rounds onto a lined sheet and bake until the edges barely color. Once cooled, a simple powdered sugar glaze and sprinkles finish them.


Expect about 24–30 cookies depending on exact scoop size. Total active time is roughly 20–30 minutes, plus cooling.


Gather these items

What you’ll need:


2 1/2 cups all-purpose flour

1 teaspoon baking powder

1/4 teaspoon salt

1/2 cup unsalted butter, softened

1 cup granulated sugar

2 large eggs

1 teaspoon vanilla extract

1 teaspoon almond extract

1 cup powdered sugar (for frosting)

1 tablespoon milk (for frosting)

Sprinkles (for decoration)

Substitution notes:


For dairy-free: use 1/2 cup vegan butter and substitute non-dairy milk for the frosting.

For a boozy note: replace half the milk in the frosting with a teaspoon of Amaretto.

If you don’t have almond extract, use an extra 1/2 teaspoon vanilla or 1/2 teaspoon anise extract for a more traditional Italian flavor.

If you like nut-forward cookies, these pair well with other Italian cookie ideas such as simple peanut-butter variations — see a quick peanut-butter option here: .


Step-by-step instructions

Pin this recipe to make it later

Pin It!

A variety of colorful Italian cookies arranged on a plate.

Preheat the oven to 350°F (175°C). Line a baking sheet with parchment paper.

Whisk together the flour, baking powder, and salt in a medium bowl. Set aside.

In a large bowl, cream the softened butter and granulated sugar until light and fluffy, about 2–3 minutes with a hand mixer.

Beat in the eggs, one at a time, then stir in the vanilla and almond extracts until combined.

Gradually add the dry ingredients to the wet mixture. Mix just until the dough comes together — don’t overwork it.

Drop tablespoonfuls of dough onto the prepared baking sheet, spacing them about 2 inches apart.

Bake for 10–12 minutes, until cookies are set and the bottoms are lightly golden.

Cool the cookies on the baking sheet 5 minutes, then transfer to a wire rack to cool completely.

For the frosting, whisk the powdered sugar with milk until smooth. Spoon or dip the tops of cooled cookies into the glaze. Add sprinkles while the glaze is wet.

Let the glaze set, then enjoy.

Pro tip: Use a small cookie scoop for even sizes and consistent bake times.


Best ways to enjoy it

These cookies are small, sweet, and versatile. Try:


Serving on a dessert platter with biscotti and amaretti for an Italian cookie assortment.

Pairing with espresso, sweetened tea, or a milky cappuccino.

Decorating for events — use colored icing and themed sprinkles for birthdays or holidays.

Tucking a few into a lunchbox or cookie tin for gifting.

For a simple after-school swap, plate them with fresh fruit and milk for a balanced snack.


How to store & freeze

Short-term storage:


Store frosted cookies in a single layer in an airtight container at room temperature for up to 3 days.

If you stack frosted cookies, separate layers with parchment to prevent sticking.

Long-term storage:


Freeze unfrosted cookies in a single layer on a sheet pan until firm, then transfer to a freezer-safe bag for up to 3 months.

Thaw at room temperature, then frost after thawing.

Food safety:


Keep at room temperature; don’t refrigerate unless your frosting contains perishable dairy or has been left out too long in hot weather. Refrigeration can dry cookies.

Pro chef tips

Room-temp butter: Let butter soften on the counter for 30–45 minutes; it should yield slightly when pressed but not be greasy.

Don’t overbeat after adding flour: Overmixing develops gluten and makes cookies tough.

Measure flour correctly: Spoon flour into the cup and level it off. Too much flour makes dense cookies.

Even browning: Rotate the baking sheet halfway through the bake if your oven has hot spots.

Make-ahead: Bake and freeze unfrosted cookies; frost after thawing to keep icing fresh.

Texture tweak: For crisper edges, flatten dough slightly before baking; for softer cookies, leave them taller.

Want another simple cookie idea to rotate into your baking queue? Try this classic 3-ingredient peanut butter cookie recipe: .


Creative twists

Citrus zest: Add 1 teaspoon lemon or orange zest to the dough for a bright note.

Chocolate dip: Dip half the cooled cookie in melted dark chocolate instead of a powdered-sugar glaze.

Anise or anisette: Swap almond extract for 1 teaspoon anise extract for a more traditional Italian flavor.

Almond joy: Press a slivered almond into the center before baking for a nutty top.

Gluten-free: Use a 1:1 gluten-free flour blend, but expect slightly different texture.

These variations let you adapt the basic recipe to seasons, holidays, or dietary needs.


Your questions answered

Q: How long do these cookies take from start to finish?

A: Active prep is about 20–30 minutes. Baking and cooling add 30–40 minutes, so plan for roughly 1 hour total.


Q: Can I make the dough ahead?

A: Yes. Refrigerate the dough in an airtight container for up to 24 hours. Let it sit at room temperature 10–15 minutes before scooping. For longer storage, freeze scooped dough balls on a sheet, then transfer to a bag for up to 3 months.


Q: Can I skip the almond extract?

A: Yes. Replace with additional vanilla or 1/2 teaspoon anise extract for a different twist.


Q: Are these safe to leave at room temperature?

A: Yes, if unfrosted or glazed with a simple powdered sugar frosting. Store in an airtight container and consume within 3 days. If your toppings contain perishable ingredients (cream cheese, buttercream), refrigerate.


Q: Why did my cookies spread too much?

A: Likely causes are too-warm butter, too little flour, or dough being too thin. Chill the dough 10–15 minutes next time and make sure butter is soft but not melted.

The famous cake my mom baked in the 80s and 90s: simple and delicious

by


The famous cake my mom baked in the 80s and 90s: simple and delicious


In the 1980s and 1990s, homemade treats had a unique flavor. There was one cake my mom baked every week—”Mommy’s Soft Cake”—simple yet irresistible, it was a hit with everyone, both adults and children. It was a simple recipe, made with wholesome ingredients and without unnecessary additives, yet it had a unique flavor.

In this article, I’ll share a cake recipe that has shaped so many people’s childhoods, with the aroma and softness of a dessert that never goes out of style.

Ingredients for a traditional, soft cake
Here’s what you’ll need to make it as it was made back then:

3 eggs
180g sugar
200g all-purpose flour
80ml vegetable oil (or 100g softened butter)
100ml milk
1 sachet baking powder
Zest of 1 lemon (or vanilla, if desired)
Powdered sugar for garnish
Simple yet balanced ingredients for a soft, aromatic, and tall cake. 

⇆

Preparation
1. Beat the eggs with the sugar.

Using an electric mixer, beat the eggs and sugar until light and fluffy.

2. Add the liquid ingredients.

Add the oil (or melted butter, if you prefer a traditional version) and room-temperature milk. Continue mixing.

3. Combine the dry ingredients.

Add the sifted flour, baking powder, and lemon zest. Stir gently from the bottom up to avoid blowing the mixture away.

4. Pour into the pan.

Grease and flour a 22-24 cm round cake pan. Pour in the batter and smooth it out.

5. Bake

Bake in a preheated oven at 180°C (350°F) for 35-40 minutes. Test with a toothpick: if it comes out clean, the cake is ready.

6. Decorate

Once cooled, dust with powdered sugar for a simple, retro touch.

Unforgettable Flavor

This cake has the flavor of authentic dishes: a soft, aromatic, and versatile base, perfect with toppings like:

chocolate chips

apple slices

⇆ 

cocoa powder for a two-color version

jam on top or in the center

Why does everyone love this cake?

Ready in 10 minutes

No blender or complicated tools required

Affordable

Perfect for breakfast, snacks, or school


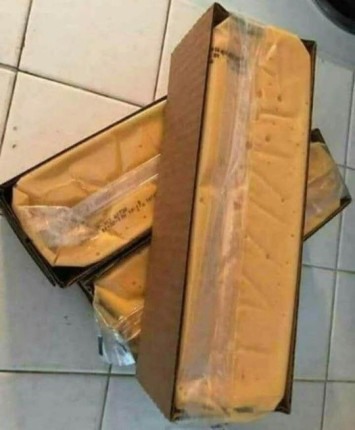
I bet you have no idea what this is. If you do, you’re definitely from way back!

by


I bet you have no idea what this is. If you do, you’re definitely from way back!

“I Bet You Have No Idea What This Is”

If You Do, You’re Definitely From Way Back!

Every once in a while, a food photo pops up that stops people in their tracks. No label. No explanation. Just a simple image and the challenge: “I bet you have no idea what this is. If you do, you’re definitely from way back!”

Suddenly, the comments fill up with guesses, memories, and stories. Because this isn’t just food—it’s a piece of the past.

A Dish from Another Time

Long before trendy ingredients and viral recipes, people cooked with what they had. These older recipes were practical, filling, and made to stretch ingredients. They often came from:

  • Farm kitchens
  • Rural households
  • Times when nothing went to waste

If you recognize a dish like this, chances are you grew up watching it being made—or eating it at someone’s table.

Why So Many People Don’t Recognize It

Many traditional recipes have faded from everyday cooking. As convenience foods and modern appliances took over, some old favorites were quietly left behind. That’s why younger generations might scroll right past, while older ones instantly know exactly what it is—and how it tastes.

To them, it’s not mysterious at all. It’s comfort.

More Than a Recipe—A Memory

⇆

These kinds of dishes carry stories: grandparents in the kitchen, meals made from scratch, and family dinners where everyone gathered without distractions. Even the smell can bring back memories you didn’t realize you still had.

That’s why posts like this strike a nerve. They remind people of where they come from—and how food connects generations.

Bringing Old Recipes Back

There’s something special about rediscovering forgotten recipes. They’re often:

  • Simple to make
  • Budget-friendly
  • Surprisingly satisfying

Recreating them keeps traditions alive and introduces younger cooks to flavors that shaped earlier generations.

So… Do You Know What It Is?

If you recognized it right away, you’re probably smiling right now. And if you didn’t, you might be curious enough to try it.

Either way, one thing’s certain: recipes like this prove that food isn’t just about eating—it’s about remembering.

Fall Awakening: Breathing Life into House Flowers with a Little Secret

by


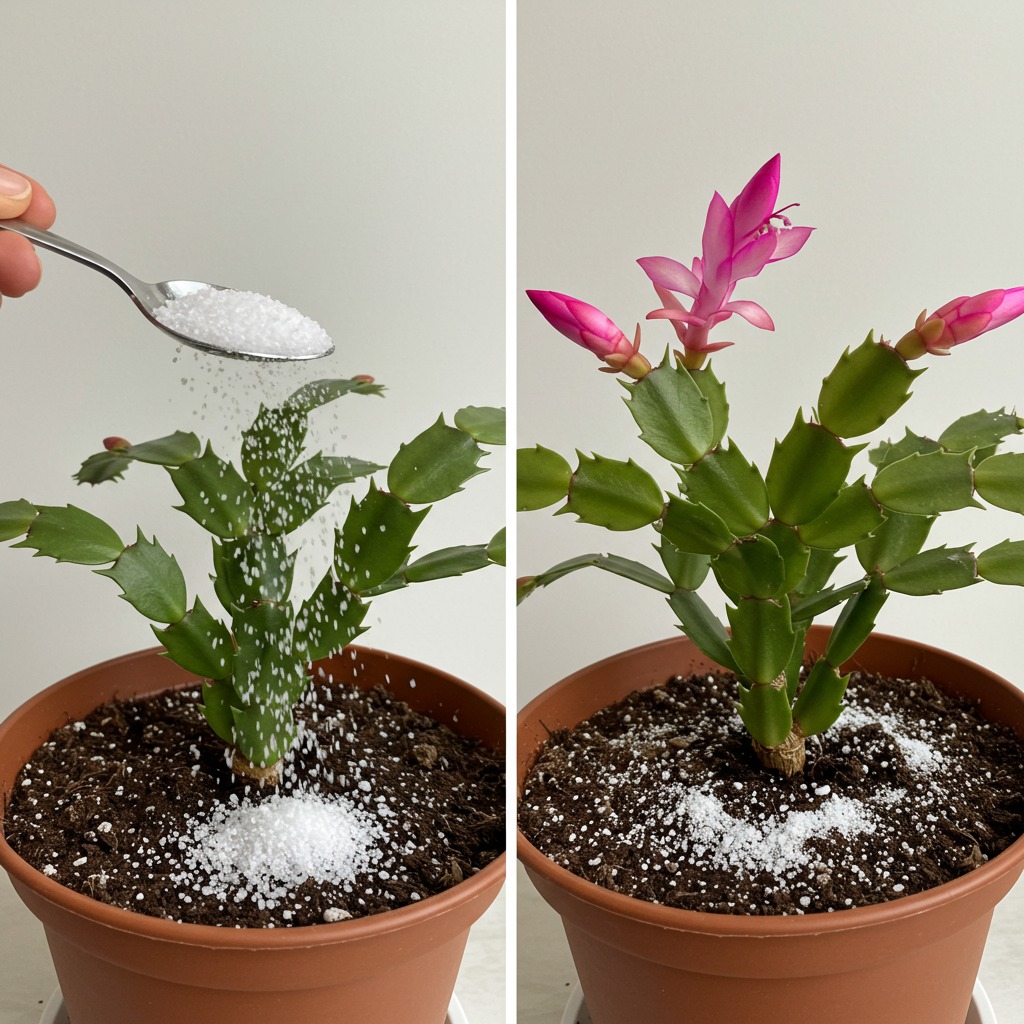
Fall Awakening: Breathing Life into House Flowers with a Little Secret

Unlock the secret to revitalizing your house flowers in the fall with just a touch of magic. This simple yet powerful technique promises to bring your indoor blooms back to life, transforming them into vibrant displays of color and vitality.

Here’s why a little of this is all you need:

    1. Seasonal Renewal: As the fall season approaches and temperatures begin to cool, it’s the perfect time to give your house flowers a boost of energy. This technique provides the nourishment they need to thrive during the transition to cooler weather.
    2. Revitalizing Effect: With just a small amount of the secret ingredient, your house flowers will spring back to life with renewed vigor. Withered leaves will perk up, stems will become stronger, and buds will form in anticipation of blooming.
    3. Promotes Blooming: One of the most exciting aspects of this technique is its ability to encourage blooming in house flowers. Even varieties that have been reluctant to flower in the past will burst into bloom, filling your home with color and fragrance.
    4. Easy Application:
    5. continued on next page     
    6.  ⇆ 
    7.  Applying this technique is simple and straightforward. Just add a little of the secret ingredient to the soil around the base of each house flower, then water as usual. The magic will work its way into the roots, revitalizing the entire plant.
      • Proven Results: Gardeners everywhere have experienced the incredible benefits of this technique, witnessing their house flowers come back to life with just a little help in the fall. It’s a tried-and-true method that delivers impressive results time and time again.

      So if you’re looking to breathe new life into your house flowers this fall, look no further than this simple yet effective technique. With just a touch of magic, you can transform your indoor blooms into a thriving oasis of beauty and vitality.