dimanche 21 décembre 2025

Parmesan Crusted Chicken with Creamy Garlic Sauce

by


why make this recipe

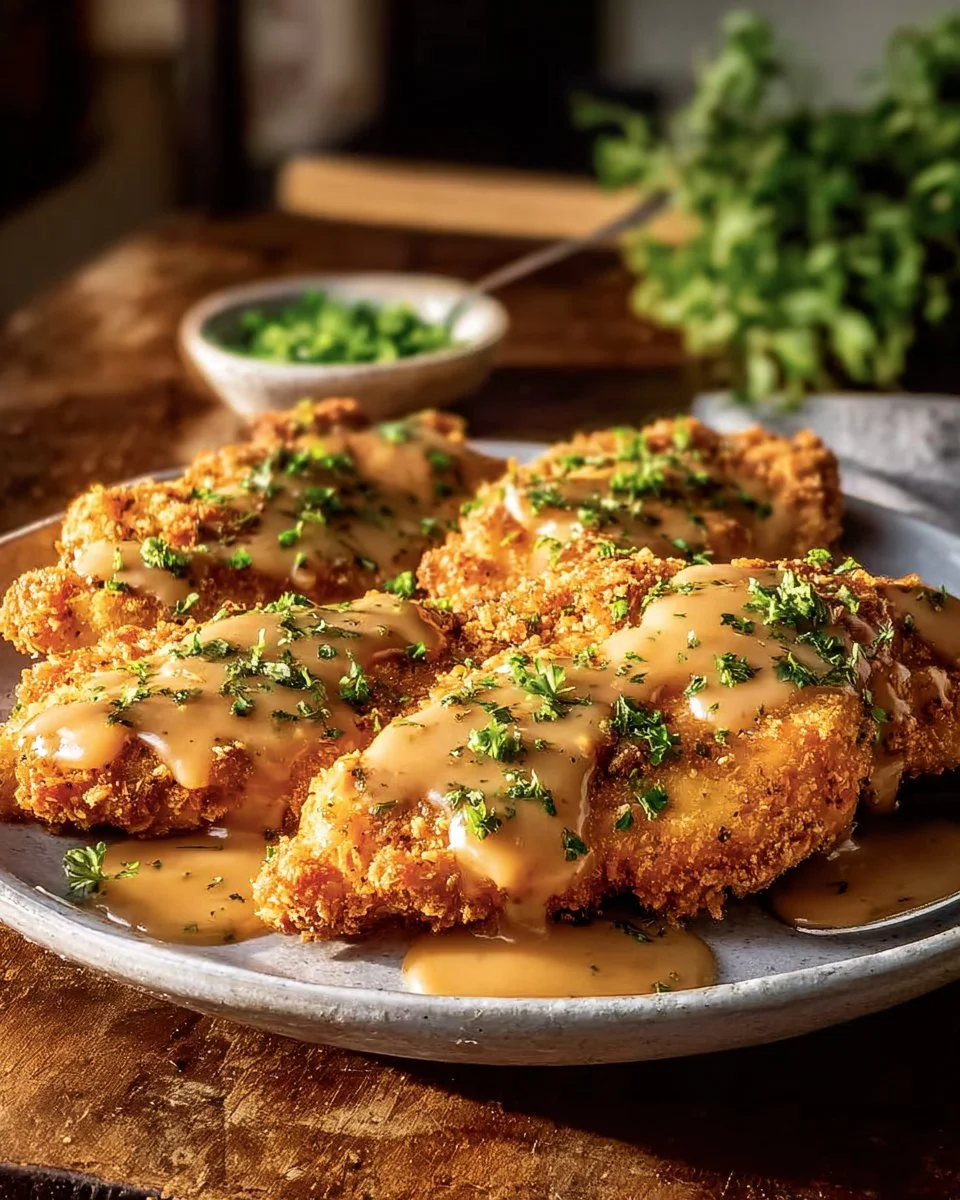
Parmesan Crusted Chicken with Creamy Garlic Sauce is a dish that brings comfort and flavor to your dinner table. It’s easy to prepare and uses simple ingredients that you might already have at home. This recipe combines crispy chicken with a smooth, rich garlic sauce that makes every bite delicious. Whether you’re cooking for your family or having friends over, this dish is sure to impress everyone.

how to make Parmesan Crusted Chicken with Creamy Garlic Sauce

Ingredients:

  • 2 boneless, skinless chicken breasts
  • 1/2 cup all-purpose flour
  • 1/4 cup grated Parmesan cheese
  • 1 teaspoon garlic powder
  • 1/2 teaspoon onion powder
  • 1/4 teaspoon salt
  • 1/8 teaspoon black pepper
  • 1/2 cup butter
  • 1/4 cup heavy cream
  • 2 cloves garlic, minced
  • 1/4 teaspoon salt
  • 1/8 teaspoon black pepper

Directions:

  1. Preheat the oven to 400°F (200°C) and line a baking sheet with parchment paper.
  2. In a shallow dish, combine the flour, Parmesan cheese, garlic powder, onion powder, salt, and pepper.
  3. Dip each chicken breast into the mixture, ensuring they are evenly coated.
  4. Place the coated chicken breasts on the prepared baking sheet and bake for 15-20 minutes, or until they are cooked through.
  5. While the chicken is baking, melt the butter in a saucepan over medium heat.
  6. Whisk in the heavy cream, minced garlic, salt, and pepper. Cook and stir the mixture until the sauce is smooth and slightly thickened.
  7. Once the chicken is done baking, arrange the chicken breasts on plates and drizzle generously with the Creamy Garlic Sauce. Enjoy your meal!

how to serve Parmesan Crusted Chicken with Creamy Garlic Sauce

Serve the Parmesan Crusted Chicken hot, drizzled with the Creamy Garlic Sauce. Pair it with a side of steamed vegetables, mashed potatoes, or a fresh green salad for a complete meal. A slice of garlic bread can also make a great addition to soak up that delicious sauce!

how to store Parmesan Crusted Chicken with Creamy Garlic Sauce

Pin this recipe to make it later

If you have leftovers, let the chicken cool completely. Store it in an airtight container in the fridge for up to 3 days. To reheat, place it in the oven at 350°F (175°C) until warmed through. You can reheat the sauce separately in a small pan over low heat.

tips to make Parmesan Crusted Chicken with Creamy Garlic Sauce
  • For extra flavor, consider marinating the chicken in some Italian herbs before coating it.
  • Make sure the butter is melted but not browned when preparing the sauce to keep it creamy.
  • If you want a crunchier crust, you can add breadcrumbs to the flour mixture.

variation

You can easily switch out the chicken for other proteins like pork chops or even tofu for a vegetarian option. Additionally, feel free to experiment with different cheeses, such as cheddar or mozzarella, for varied flavors.

FAQs

What can I serve with Parmesan Crusted Chicken?
You can serve it with pasta, rice, or a variety of vegetables. A salad also goes well with this dish.

Can I freeze leftovers?
Yes, you can freeze the leftover chicken. Make sure it’s in an airtight container and consume it within two months for the best quality.

How do I tell when the chicken is done?
The chicken is done when its internal temperature reaches 165°F (75°C). You can check this with a meat thermometer.

Pan Fried Asparagus

by


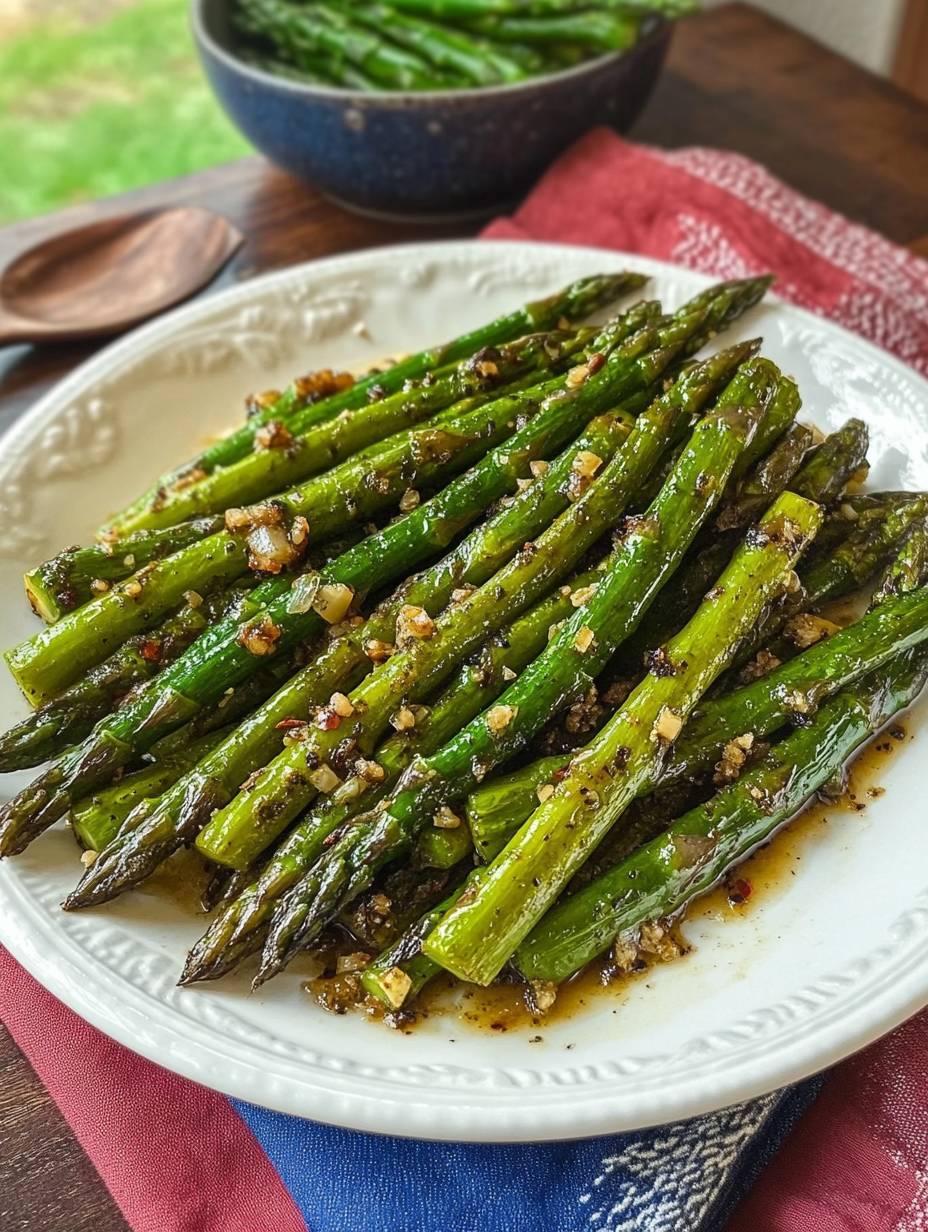
Pan Fried Asparagus is a quick and easy side dish that brings out the fresh taste of asparagus. It’s a simple way to cook this green veggie that makes it crisp and flavorful. You can enjoy it in just about 15 minutes!

Why Make This Recipe

Making Pan Fried Asparagus is a great choice because it is healthy, delicious, and easy to prepare. Asparagus is packed with nutrients, and when you cook it this way, it keeps its crunchy texture. Plus, the garlic and lemon add wonderful flavors!

How to Make Pan Fried Asparagus

Ingredients

  • 1 pound asparagus, trimmed
  • 2 tablespoons olive oil
  • 2 cloves garlic, minced
  • Salt and pepper to taste
  • Lemon wedges for serving (optional)

Directions

  1. Heat the olive oil in a large skillet over medium-high heat.

  2. Add the trimmed asparagus to the skillet and sauté for about 5-7 minutes, turning occasionally, until the asparagus is tender but still crisp.

  3. Add the minced garlic during the last 1-2 minutes of cooking to prevent it from burning.

  4. Season with salt and pepper to taste.

  5. Remove from heat and serve immediately with lemon wedges on the side if desired.

How to Serve Pan Fried Asparagus

Serve the Pan Fried Asparagus warm as a side dish to your favorite meal. It goes great with chicken, fish, or pasta. Squeeze a bit of lemon juice on top for extra flavor!

How to Store Pan Fried Asparagus

Pin this recipe to make it later

If you have leftovers, store the asparagus in an airtight container in the refrigerator. It’s best to eat it within 2-3 days for the best taste and texture.

Tips to Make Pan Fried Asparagus

  • Choose fresh asparagus that is bright green and firm.
  • Do not overcrowd the pan; cook in batches if needed for even cooking.
  • For extra flavor, you can sprinkle Parmesan cheese on top just before serving.

Variation (If Any)

You can add other ingredients like cherry tomatoes or bell peppers to the pan for extra color and taste. A sprinkle of red pepper flakes can also add a nice kick!

FAQs

Can I use frozen asparagus for this recipe?
Yes, but fresh asparagus gives the best flavor and texture.

What if I don’t have garlic?
You can leave out the garlic or use garlic powder instead.

Can I cook asparagus in the oven instead?
Yes, you can roast asparagus in the oven with olive oil and seasonings for a different flavor.

Easy Pizza-Stuffed Pumpkins for Halloween Dinner

by


Halloween Just Got Tastier with Pizza-Stuffed Pumpkins

Are you ready to transform your Halloween dinner into a whimsical delight? Easy Pizza-Stuffed Pumpkins are the perfect way to celebrate the season! Imagine the fun of carving pumpkins, but instead of a spooky face, you get a savory dish bursting with cheesy goodness. This recipe combines the flavors of classic pizza with a unique presentation that’s kid-friendly and sure to impress guests. It’s not just a meal; it’s an experience that brings the whole family together for some delicious, festive fun.


Reasons to Try This Recipe

There are countless reasons to whip up these delightful pumpkin treats this Halloween! First and foremost, they’re quick and easy to prepare, making them perfect for busy weeknights or last-minute gatherings. The combination of creamy ricotta, gooey mozzarella, and savory garlic ensures that every bite is a flavorful surprise. Plus, with their festive appearance, they can serve as an impressive centerpiece for your Halloween festivities.


"These Zombie Pumpkins were not only adorable but delicious! My kids devoured them, calling them ‘pizza pumpkins.’ It’s a fun and easy recipe I’ll definitely revisit!"


The Cooking Process Explained

Creating your Easy Pizza-Stuffed Pumpkins is as straightforward as the name suggests! You’ll start by crafting the cheesy filling, then hollow out those pumpkins to make room for all that gooey goodness. With only a few simple steps, these spooky eats will be ready in no time.


What You’ll Need

Pin this recipe to make it later

Pin It!

Halloween dinner with easy pizza-stuffed pumpkins recipe

To get started, make sure you have the following ingredients at hand:


2 cups (16 oz.) ricotta cheese

1 cup shredded mozzarella cheese

1/2 cup finely grated Parmesan cheese

1 tsp. kosher salt

1/4 tsp. freshly ground black pepper

1 (16.3-oz.) tube Pillsbury Grands Southern Homestyle Biscuits

1 cup (1/2 stick) unsalted butter

2 cloves garlic, finely chopped

1 Tbsp. chopped fresh parsley

1 tsp. paprika

16 (1"-long) thin pretzel sticks

Marinara sauce, for serving

2 cups shredded cheddar cheese

Feel free to get creative with your ingredients; swap out cheeses or add your favorite pizza toppings!


Step-by-Step Instructions

Preheat your oven to 375°F (190°C).

In a mixing bowl, combine ricotta, mozzarella, Parmesan, salt, pepper, garlic, parsley, and paprika. Stir until well blended.

Hollow out your pumpkins by cutting off the tops and scooping out the insides.

Open the tube of biscuits and flatten each biscuit slightly. Fill each pumpkin with the cheesy mixture.

Top each pumpkin with shredded cheddar cheese.

Place the pumpkins in a baking dish and pour melted butter over them.

Bake for about 25–30 minutes, or until the biscuits are golden brown and the cheese is bubbly.

Once done, stick a pretzel rod into the top of each pumpkin for decoration. Serve hot with marinara sauce on the side for dipping.

Creative Ideas for Serving These Pumpkins

To make your pizza-stuffed pumpkins even more festive, consider serving them with a side of roasted garlic bread or a fresh green salad. Arranging a vibrant plate with assorted veggies and a dipping sauce can also make an appealing presentation. For drinks, a pumpkin-spiced latte or an apple cider pairs beautifully.


Keeping Leftovers Fresh

If you have leftovers (which is rare, but can happen!), store them in an airtight container in the fridge for up to 3 days. To reheat, place the pumpkins back in the oven or microwave until warmed through. If you’d like to enjoy them later, the pumpkins can be frozen before baking. Just thaw them in the fridge before popping them in the oven for a quick meal.


Helpful Cooking Tips

Pumpkin Selection: Choose smaller pumpkins known as "sugar pumpkins" for the best flavor. They’re sweeter and have a more enjoyable texture.

Biscuit Swaps: Use crescent rolls or other biscuit types for different textures — flaky or soft, depending on your preference.

Add More Flavor: Feel free to spice up the ricotta filling with Italian herbs or chopped pepperoni for a classic pizza flavor.

Creative Twists to Try

Why stop at the classic pizza flavor? Here are a few creative variations:


Mexican Fiesta Pumpkins: Substitute the cheese filling with a mixture of black beans, corn, taco seasoning, and a sprinkle of cheddar.

Vegan Option: Replace the cheeses with your favorite plant-based alternatives and use dairy-free butter.

Breakfast Treats: Fill the pumpkins with scrambled eggs, cheese, and diced veggies for a fun breakfast option.

Your Questions Answered

What’s the prep time for this recipe?

Prep time is about 20 minutes, with a total cooking time of around 30 minutes, making it a quick Halloween meal!


Can I use different types of cheese?

Absolutely! Feel free to mix and match cheeses according to your taste preferences. Goat cheese, feta, or a spicy pepper jack can add a unique twist.


How can I ensure safety when storing and reheating?

Always allow the pumpkin to cool completely before transferring it to an airtight container. Reheat thoroughly to 165°F (74°C) before enjoying leftovers.


With these tips and variations, the Easy Pizza-Stuffed Pumpkins for Halloween Dinner can become a beloved tradition! Enjoy the deliciousness and creativity this festive dish brings to your table.


Chicken Fettuccine Alfredo Recipe

by


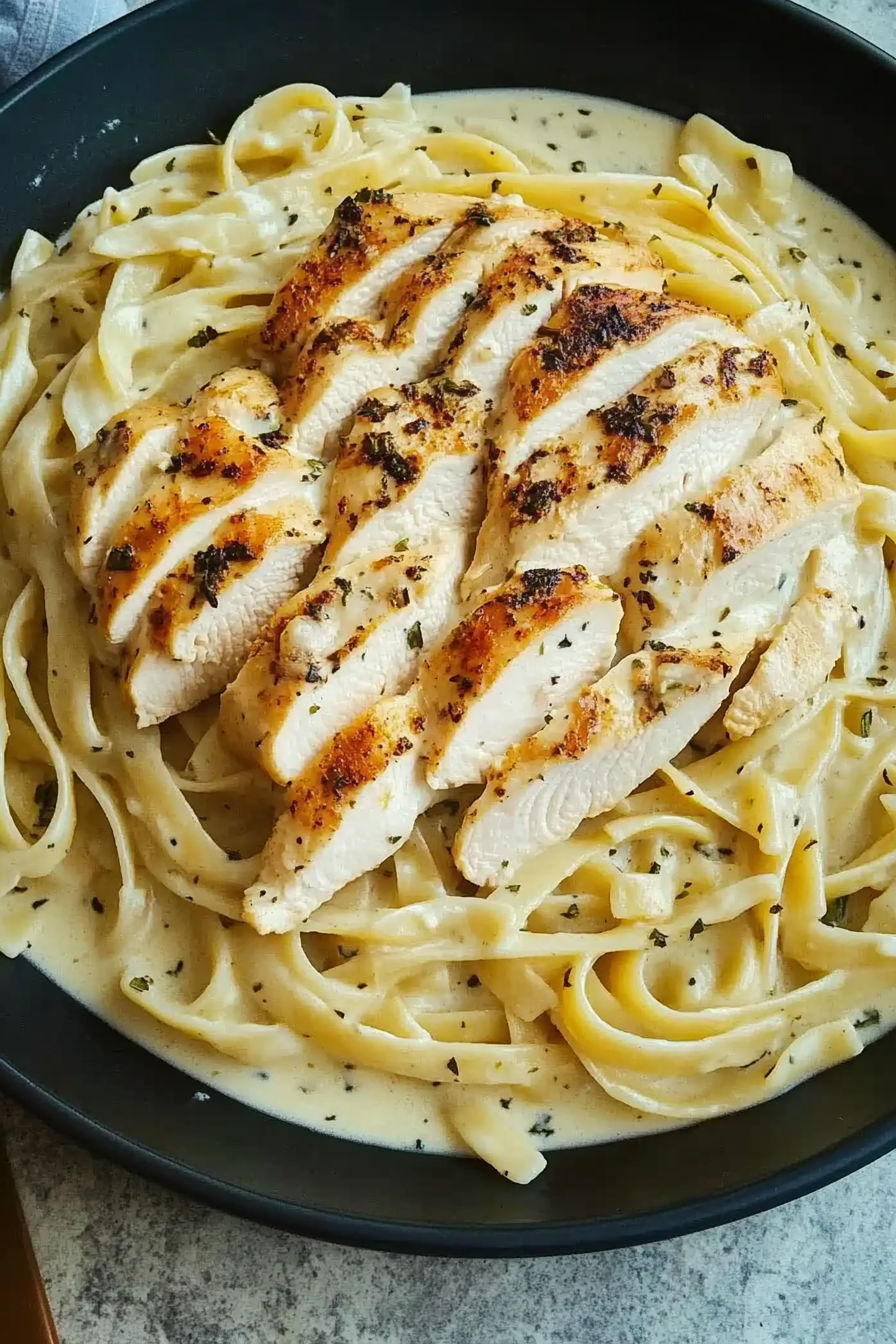
If you’re in the mood for a creamy and delicious pasta dish, look no further than Chicken Fettuccine Alfredo! This classic Italian-American recipe is hearty, satisfying, and easy to make. With tender chicken and a rich Alfredo sauce, it’s a favorite for families and friends alike.

Why Make This Recipe

Chicken Fettuccine Alfredo is great for many reasons. First, it is quick to prepare, making it perfect for busy weeknights. Second, it requires simple ingredients that you likely already have in your kitchen. Finally, the taste is incredible—a creamy sauce combined with tender pasta and juicy chicken makes this dish a winner every time!

How to Make Chicken Fettuccine Alfredo

Ingredients:

  • 2 large chicken breasts, pounded even
  • 2 tablespoons olive oil
  • ½ teaspoon salt
  • ¼ teaspoon fresh ground black pepper
  • 1 teaspoon dried Italian seasoning
  • ½ cup unsalted butter
  • 2 garlic cloves, minced
  • 2 cups heavy cream, warmed to room temperature
  • ½ teaspoon kosher salt
  • ½ teaspoon fresh ground black pepper
  • ½ teaspoon dried Italian seasoning
  • 2 cups fresh grated Parmesan cheese
  • 16 ounces uncooked fettuccine noodles (fresh or dried)

Directions:

  1. Drizzle and rub 1 tablespoon of olive oil on the chicken breasts. Sprinkle with salt, fresh ground black pepper, and Italian seasoning.
  2. Heat the remaining olive oil in a large skillet or cast iron skillet over medium heat. Cook the chicken until it is golden brown on both sides and cooked through. Remove from the skillet, put it on a cutting board, cover loosely with an aluminum foil tent, and let it rest.
  3. Melt the butter in a large skillet or saucepan over medium-low heat. Add the garlic and cook for 1 minute while stirring. Whisk in the cream, kosher salt, fresh ground black pepper, and Italian seasoning. Simmer until slightly thickened but do not boil. Reduce the heat as low as it will go and stir in the Parmesan cheese until melted.
  4. Meanwhile, bring a large pot of salted water to boil. Add the fettuccine noodles and cook al dente according to the package directions. Reserve ½ cup of pasta water and drain well.
  5. Add the fettuccine noodles to the Alfredo sauce. Cut the chicken into thin slices and add it to the pasta. Season with more salt and fresh ground black pepper to taste. If desired, sprinkle with more freshly grated Parmesan cheese.

How to Serve Chicken Fettuccine Alfredo

Serve Chicken Fettuccine Alfredo hot on a plate. You can sprinkle extra Parmesan cheese on top and add some fresh parsley for color. Pair it with a side salad or garlic bread for a complete meal.

How to Store Chicken Fettuccine Alfredo

Pin this recipe to make it later

Store any leftover Chicken Fettuccine Alfredo in an airtight container in the fridge. It will stay fresh for about 3 days. To reheat, you can use the microwave or heat it gently on the stove, adding a splash of milk if the sauce thickens too much.

Tips to Make Chicken Fettuccine Alfredo

  • Make sure to pound the chicken breasts evenly for even cooking.
  • Warm the heavy cream before adding it to the sauce to help it combine smoothly.
  • Taste the sauce before serving; adjust seasoning as needed.

Variation (If Any)

You can easily add vegetables to your Chicken Fettuccine Alfredo. Broccoli, spinach, or peas make great additions for more flavor and nutrition. You could also try using shrimp instead of chicken for a seafood twist.

Easy Baked Honey Dijon Chicken

by


Why Make This Recipe

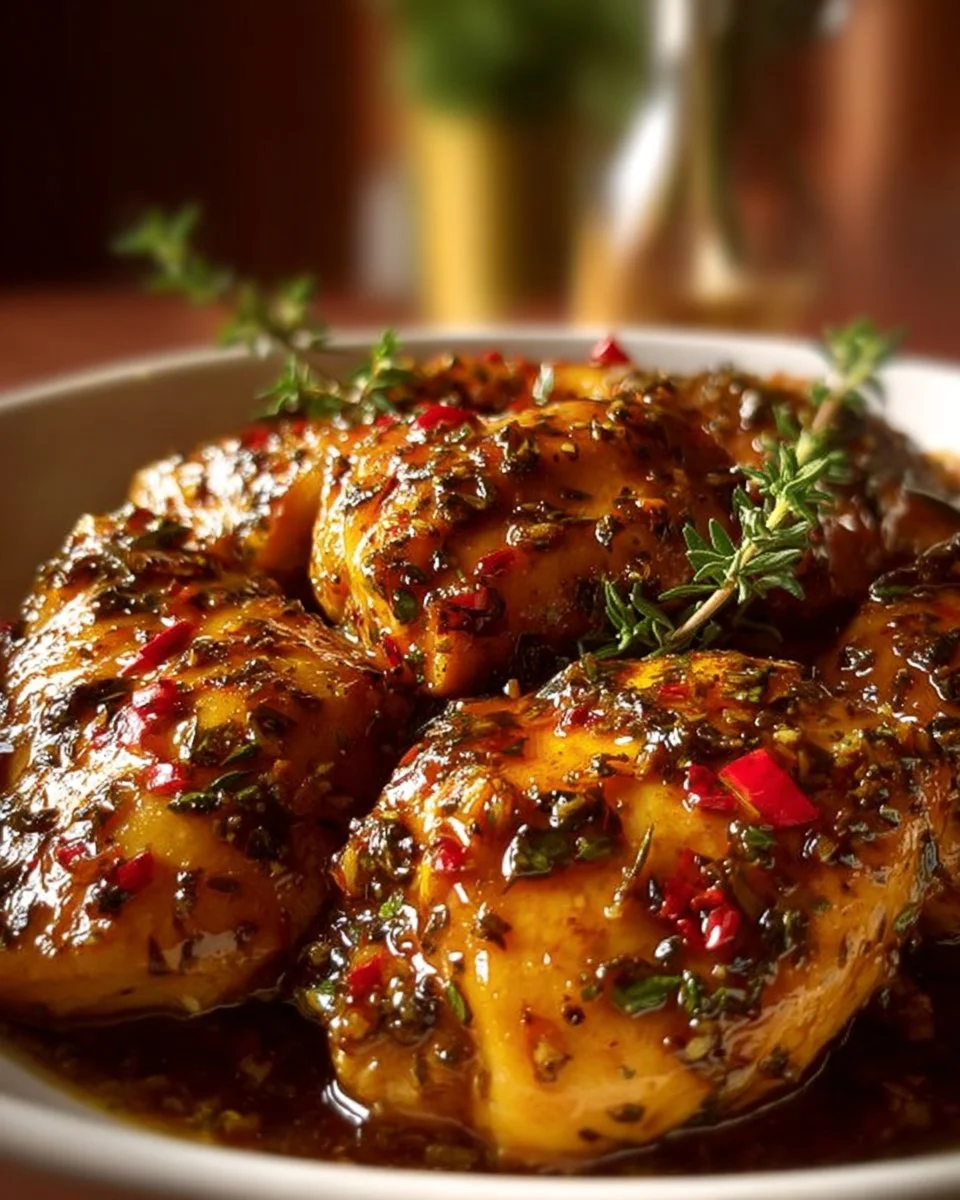
Easy Baked Honey Dijon Chicken is a delicious dish that brings together the sweet and tangy taste of honey and Dijon mustard. It’s simple to prepare, making it perfect for busy weeknights or special occasions. This recipe is not only quick but also flavorful, ensuring that your family will love it. Plus, it uses simple ingredients that you might already have in your kitchen.

How to Make Easy Baked Honey Dijon Chicken

Ingredients

  • 2 large chicken breasts
  • 1/4 cup honey
  • 1/4 cup Dijon mustard
  • 2 tbsp olive oil
  • 1 tbsp apple cider vinegar
  • 1 tsp garlic powder
  • 1 tsp dried basil
  • Salt & black pepper, to taste
  • Fresh thyme, for garnish

Directions

  1. Preheat your oven to 375°F (190°C).
  2. In a mixing bowl, combine honey, Dijon mustard, olive oil, apple cider vinegar, garlic powder, dried basil, salt, and pepper.
  3. Place chicken breasts in a baking dish and pour the honey Dijon mixture over them, ensuring they are well coated.
  4. Bake in the preheated oven for 25-30 minutes, or until the chicken is cooked through and no longer pink in the center.
  5. Garnish with fresh thyme before serving.

How to Serve Easy Baked Honey Dijon Chicken

This dish pairs well with a variety of sides. You can serve it with rice, steamed vegetables, or a fresh salad. The sweet and tangy sauce also makes it delicious in sandwiches or wraps. Simply slice the chicken and add it to your favorite bread or tortilla for a tasty meal on the go.

How to Store Easy Baked Honey Dijon Chicken

Pin this recipe to make it later

If you have leftovers, store the chicken in an airtight container in the fridge. It will stay fresh for up to 3 days. You can also freeze it for up to 2 months. Just make sure to put it in a freezer-safe container. When you’re ready to eat it, thaw in the fridge overnight and reheat in the oven or microwave until warm.

Tips to Make Easy Baked Honey Dijon Chicken

  • For extra flavor, let the chicken marinate in the honey Dijon mixture for an hour before baking.
  • You can use bone-in chicken pieces instead of breasts; just adjust the cooking time accordingly.
  • Add vegetables like carrots or broccoli in the baking dish for a complete one-pan meal.

Variation

You can customize this dish by adding different herbs or spices. Try using rosemary instead of basil for a different flavor. You can also switch the honey for maple syrup for a unique twist!

FAQs

Q: Can I use other types of mustard?
A: Yes, you can use yellow mustard or honey mustard if you prefer a different flavor profile.

Q: Is it necessary to use chicken breasts?
A: No, you can use thighs or drumsticks if you like dark meat. Just make sure to adjust the cooking time.

Q: Can I make this recipe ahead of time?
A: Yes, you can prepare the chicken and sauce ahead of time. Store them separately in the fridge and combine them just before baking.

Garlic Butter Steak Bites & Spicy Cajun Alfredo Twisted Pasta

by


Elevate Your Dinner with Garlic Butter Steak Bites & Spicy Cajun Alfredo Twisted Pasta

If you’re on the hunt for a scrumptious dinner that perfectly marries flavors and textures, look no further. Garlic Butter Steak Bites & Spicy Cajun Alfredo Twisted Pasta is a delightful dish that brings together juicy steak, aromatic garlic, and a creamy Cajun sauce that will tantalize your taste buds. Every bite is an explosion of flavor, making it ideal for both weeknight meals and special occasions. I first made this dish on a whim, and it quickly became a household favorite—perfect for impressing guests or simply treating yourself after a long week.


Reasons to Try It

You might wonder, why should you make this dish today? First off, it’s incredibly quick to whip up—making it a lifesaver for busy weeknights. In just about 30 minutes, you can serve a gourmet-level meal that feels indulgent but won’t break the bank. The garlic butter steak bites add a savory note, while the spicy Cajun Alfredo sauce gives the pasta a delicious kick. It’s loaded with flavor, yet straightforward enough for home cooks of all levels. Plus, kids adore it!


“This dish is a game-changer! Quick, delicious, and my whole family asked for seconds.” – A Happy Home Cook


How This Recipe Comes Together

This delightful recipe is comprised of two elements that complement one another beautifully: the tender garlic butter steak bites and the creamy, spicy pasta. The process is simple and involves sautéing, boiling, and combining flavors to create a dish that’s nothing short of spectacular.


What You’ll Need

Ingredients List:


1.5 pounds sirloin steak, cut into bite-sized cubes

3 tablespoons olive oil

4 tablespoons butter

4 cloves garlic, minced

1 teaspoon garlic powder

1 teaspoon smoked paprika

8 ounces twisted pasta

1 cup heavy cream

1 tablespoon Cajun seasoning

1/2 cup grated Parmesan cheese

Salt and pepper to taste

Feel free to get creative with substitutions! For instance, you can use chicken or shrimp instead of steak, or opt for a gluten-free pasta to suit dietary needs.


Step-by-Step Instructions

Sauté the Base: In a large skillet, heat olive oil and melt butter over medium-high heat. Add minced garlic, garlic powder, and smoked paprika. Sauté for about a minute until fragrant.


Cook the Steak: Add the sirloin steak cubes to the skillet. Season with salt and pepper to taste. Cook until browned on all sides, approximately 4-5 minutes.


Prepare the Pasta: While the steak is cooking, boil the twisted pasta according to the package instructions. Once done, drain and set aside.


Make the Alfredo Sauce: In a separate pot, heat the heavy cream. Stir in the Cajun seasoning and Parmesan cheese, allowing the sauce to thicken slightly.


Combine & Serve: Mix the cooked pasta with the Cajun Alfredo sauce until well combined. Serve the garlic butter steak bites generously on top. Enjoy every bite!


Best Ways to Enjoy It

Pin this recipe to make it later

Pin It!

Garlic Butter Steak Bites served with Spicy Cajun Alfredo Twisted Pasta

For an appealing presentation, consider serving this dish in individual bowls, garnished with extra Parmesan cheese and freshly chopped parsley. It pairs wonderfully with a side of garlic bread and a crisp green salad for a well-rounded meal. If you’re feeling adventurous, a sprinkle of crushed red pepper flakes can elevate the spice level even more!


Keeping Leftovers Fresh

Storing leftovers properly is crucial to maintaining flavor and safety. Allow the dish to cool to room temperature before transferring it to an airtight container. You can store it in the fridge for up to three days. If you happen to make too much, freeze the steak and pasta separately in freezer-safe containers for up to three months. Just make sure to reheat thoroughly before enjoying again!


Pro Chef Tips

Use High-Quality Steak: The better the cut of meat, the more flavorful your dish will be. Sirloin is a great choice, but ribeye or filet mignon can make it even richer.

Don’t Overcook the Steak: The goal is a juicy steak bite; take care not to overcook it for tenderness.

Consistency of Sauce: If your Alfredo sauce seems too thick, thin it out with a splash of pasta water before combining it with the pasta.

Creative Twists

Looking to shake things up? Here are some variations to explore:


Spice it Up: Swap the Cajun seasoning for different spices like Italian herbs or even a garlic parmesan blend for a different flavor profile.

Vegetable Additions: Toss in some sautéed bell peppers, mushrooms, or spinach for an extra nutrition boost.

Different Pasta Shapes: Feel free to substitute with any pasta shapes you have on hand; penne or farfalle work great!

Your Questions Answered

How long does this recipe take to prepare?

Expect about 30 minutes, making it a quick indulgence.


Can I make this dish ahead of time?

While best enjoyed fresh, it can be stored for up to three days in the fridge.


Are there any good substitutions?

Absolutely! Swap out steak for chicken, shrimp, or even a plant-based protein. Gluten-free pasta can also accommodate dietary restrictions.


What if I don’t have Cajun seasoning?

You can easily make a homemade blend using paprika, cayenne, garlic powder, and oregano as substitutes.

Pecan Pie Balls

by


I remember making these pecan pie balls on a chilly afternoon when I wanted the flavor of pecan pie without heating the oven. They’re bite-sized, no-bake, and pack that buttered-crumb, caramel-y pecan flavor into little hand-held treats — perfect for cookie exchanges, last-minute guests, or a simple weeknight dessert. If you’re into pecan-forward treats, you might also like this bourbon twist on pecan pie I’ve used as inspiration: .


Why you’ll love this dish

These Pecan Pie Balls are one of those recipes that checks a lot of boxes: no oven required, pantry-friendly ingredients, and quick to assemble. They concentrate the classic pecan-pie flavor into neat little portions that kids can handle and adults can customize (hello, chocolate coating and a pinch of sea salt).


“Tiny bites of pecan pie — all the flavor with none of the fuss. Perfect for parties and last-minute desserts.” — a friend who sneaks them out of the fridge


Reasons to make them now:


No-bake and fast: about 45 minutes total, mostly chilling time.

Works for parties: easy to make in large batches and transportable.

Versatile: dip in chocolate, roll in extra nuts, or leave plain.

Kid-approved: no hot stove or oven time during assembly.

The cooking process explained

Before you start, here’s what to expect: chop your pecans, stir everything into a sticky dough, chill so it’s firm enough to roll, shape into balls, then optionally coat in melted chocolate and set. The entire hands-on time is under 15 minutes; chilling and chocolate-setting add more time. Yield is roughly 18–24 bite-sized balls depending on size.


What you’ll need

1 cup chopped pecans (toasted for extra flavor)

1 cup graham cracker crumbs

1 cup powdered sugar

1/2 cup brown sugar (packed)

1/2 cup light corn syrup

1/2 cup butter, melted

1 teaspoon vanilla extract

Chocolate for coating (optional)

Ingredient notes and swaps:


For a nuttier crunch, lightly toast the pecans on a sheet in a 350°F oven for 6–8 minutes and cool.

Use gluten-free graham crumbs or gluten-free cookies to make these gluten-free.

Maple syrup can replace some corn syrup for a more autumnal flavor, but the texture will be slightly softer.

If you enjoy no-bake confections, these share a family resemblance with rice krispie-style treats: .

Step-by-step instructions

Pin this recipe to make it later

Pin It!

Delicious pecan pie balls served on a dessert platter

Combine: In a large bowl, add chopped pecans, graham cracker crumbs, powdered sugar, brown sugar, corn syrup, melted butter, and vanilla. Mix until everything is well combined and sticky.

Chill: Cover the bowl and refrigerate the mixture for about 30 minutes. This firms it up so it’s easy to scoop.

Shape: Scoop small portions (about 1 to 1½ tablespoons each) and roll into balls with your hands. If the mixture sticks to your palms, lightly wet or oil them.

Coat (optional): Melt chocolate (use a double boiler or microwave in 20‑second bursts, stirring). Dip each ball into the chocolate to coat, letting excess drip off.

Set: Place coated balls on parchment paper. Refrigerate until the chocolate is fully firm, about 20–30 minutes. Enjoy!

Best ways to enjoy it

Serve these pecan pie balls on a dessert platter alongside espresso, a scoop of vanilla ice cream, or a spoonful of whipped cream for contrast. For holiday entertaining, arrange them with other small bites — dried fruit, chocolate-covered pretzels, and small squares of fudge make a pretty board. You can also stick a festive toothpick in each for easy passing at a party.


Storage and reheating tips

Refrigerator: Store in an airtight container for up to 5–7 days. Keep chocolate-coated balls on a single layer or separated by parchment to avoid sticking.

Freezing: Freeze uncoated or coated balls in a single layer on a tray until firm, then transfer to a freezer-safe bag or container for up to 3 months. Thaw in the fridge for a few hours before serving.

Safety: Because these contain butter and corn syrup but are kept refrigerated, avoid leaving them at room temperature for more than 2 hours to prevent spoilage in warm environments.

Pro chef tips

Texture control: If the mixture feels too wet after chilling, add a tablespoon or two of graham crumbs or powdered sugar to firm it up. If it’s too dry, a splash more corn syrup or a little melted butter will bring it together.

Uniform balls: Use a small cookie scoop for consistent size and quicker shaping.

Chocolate finish: For glossy chocolate, temper it or stir in a small amount of coconut oil to ease dipping. Tap the dipped ball gently on the side of the bowl to remove excess chocolate.

Hands-on shortcut: Chill the mixture in a shallow pan for faster cooling. Scoop with a melon baller instead of rolling by hand.

For more pecan-inspired recipes and ideas to pair on a brunch table, I like keeping a baked-pecan-pie French toast casserole in my rotation: .

Creative twists

Chocolate-drizzled with sea salt: Dip in chocolate and finish with flaky sea salt for a sweet-salty hit.

Maple-bourbon: Stir 1–2 teaspoons bourbon and 1 tablespoon maple syrup into the mix for a boozy, autumnal flavor.

Coconut-pecan: Fold 2 tablespoons of shredded coconut into the mixture before chilling.

Nut swap: Substitute walnuts or cashews for pecans, though the classic pecan flavor is hard to beat.

Vegan version: Use vegan butter and swap corn syrup for agave or a thick maple syrup; check texture adjustments.

Common questions

Q: How long do these take to make from start to finish?

A: Active prep is about 10–15 minutes. Chill time is about 30 minutes; add 20–30 minutes if coating with chocolate.


Q: Can I use another sweetener instead of corn syrup?

A: Yes — light corn syrup gives chewiness and shine, but you can use light maple syrup or agave. Expect a slightly softer texture; you may need extra crumbs to firm the mixture.


Q: Are these safe to freeze and reheat?

A: Yes. Freeze on a tray until firm, then store in an airtight container for up to 3 months. Thaw in the refrigerator. Don’t microwave coated balls; let them come to room temp for a few minutes before serving.


Q: Can I make these nut-free?

A: Replace pecans with toasted seeds (pumpkin or sunflower) and increase graham crumbs slightly for texture. The flavor will differ from pecan pie, but the format still works.


Q: What if my mixture never firms up?

A: Add a tablespoon at a time of graham crumbs or powdered sugar and chill again until it holds together.